Run Kubernetes Cluster Using Linode LKE and Terraform Cloud
Learn how to set up managed Kubernetes on Linode via Terraform.

LKE is a fully-managed K8s container orchestration engine for deploying and managing containerized applications and workloads. LKE combines Linode’s ease of use and simple pricing with infrastructure efficiency.
In this Guide
This guide will walk you through the steps needed to deploy a Kubernetes cluster using LKE + Terraform via GitHub and Terraform Cloud.
Prerequisites For Cluster Setup
Linode Account
Terraform Cloud
5 user maximum for a team on the free tier https://cloud.hashicorp.com/products/terraform/pricing
GitHub
Public/Private terraform code repository.
Architecture

Before you Begin
Create a personal access token for Linode’s API v4. Follow the Getting Started with the Linode API to get a token. You will need a token to be able to create Linode resources using Terraform.
Note Ensure that your token has, at minimum, Read/Write permissions for Linodes, Kubernetes, NodeBalancers, and Volumes.
Review the A Beginner’s Guide to Terraform to familiarize yourself with Terraform concepts if you have not used the tool before. This guide assumes familiarity with Terraform and its native HCL syntax.
Prepare your Local Environment
Install kubectl
macOS:
Install via Homebrew:
brew install kubernetes-cliIf you don’t have Homebrew installed, visit the Homebrew home page for instructions. Alternatively, you can manually install the binary; see the Kubernetes documentation for instructions.
Linux:
Download the latest kubectl release:
curl -LO https://storage.googleapis.com/kubernetes-release/release/$(curl -s https://storage.googleapis.com/kubernetes-release/release/stable.txt)/bin/linux/amd64/kubectlMake the downloaded file executable:
chmod +x ./kubectlMove the command into your PATH:
sudo mv ./kubectl /usr/local/bin/kubectlNote You can also install kubectl via your package manager; visit the Kubernetes documentation for instructions.
Clone example configuration
First, clone the example repository and check out the “simple” branch. This repository contains an example configuration to create 3 worker nodes and 1 load balancer.
git clone git@github.com:jbovet/linode-lke-terraform-cloud.git
cd linode-lke-terraform-cloud
git checkout simple
This repository contains terraform source code:
➜  linode-lke-terraform-cloud git:(main) tree .
.
├── LICENSE
├── README.md
├── data.tf
├── img
│   └── diagram.png
├── locals.tf
├── main.tf
├── outputs.tf
├── provider.tf
└── variables.tf

1 directory, 9 files
Define resources like Linode API Token and Terraform provider in provider.tf file
terraform {
  required_providers {
    linode = {
      source  = "linode/linode"
      version = "1.29.2"
    }
  }
}

//get api token access from linode
provider "linode" {
  token = var.token
}
Check main.tf to see cluster and load balancer with nodes configuration.
resource "linode_lke_cluster" "awesome_cluster" {
  k8s_version = var.k8s_version
  label       = var.label
  region      = var.region
  tags        = var.tags

  dynamic "pool" {
    for_each = var.pools
    content {
      type  = pool.value["type"]
      count = pool.value["count"]
    }
  }
}

resource "linode_nodebalancer" "awesome_cluster_lb" {
  label                = var.label
  region               = var.region
  tags                 = var.tags
  client_conn_throttle = var.conn_throttle
}

resource "linode_nodebalancer_config" "awesome_cluster_lb_config" {
  nodebalancer_id = linode_nodebalancer.awesome_cluster_lb.id
  port            = 443
  protocol        = "http"
  check           = "http"
  check_path      = "/ping"
  check_attempts  = 3
  check_timeout   = 5
  check_interval  = 30
  algorithm       = "source"
}

resource "linode_nodebalancer_node" "awesome_cluster_lb_node" {
  count           = var.nodes_count
  nodebalancer_id = linode_nodebalancer.awesome_cluster_lb.id
  config_id       = linode_nodebalancer_config.awesome_cluster_lb_config.id
  address         = "${element(local.lke_node_ips, count.index)}:80"
  label           = var.label
  weight          = 50
}
and locals.tf
locals {
  lke_node_ids = flatten(
    [for pool in linode_lke_cluster.awesome_cluster.pool :
      [for node in pool.nodes : node.instance_id]
    ]
  )
  lke_node_ips = data.linode_instances.awesome_cluster.instances.*.private_ip_address
}
Export the output Terraform state it should be stored in Terraform Cloud, check outputs.tf file
//Export this cluster's attributes
output "kubeconfig" {
  value     = linode_lke_cluster.awesome_cluster.kubeconfig
  sensitive = true
}

output "api_endpoints" {
  value = linode_lke_cluster.awesome_cluster.api_endpoints
}

output "status" {
  value = linode_lke_cluster.awesome_cluster.status
}

output "id" {
  value = linode_lke_cluster.awesome_cluster.id
}

output "pool" {
  value = linode_lke_cluster.awesome_cluster.pool
}
See default values in file variables.tf
variable "token" {
  description = "Your Linode API Access Token (required)"
}

variable "nodes_count" {
  description = "Worker nodes count(required)"
  default     = "3"
}

variable "k8s_version" {
  description = "The Kubernetes version to use for this cluster. (required)"
  default     = "1.23"
}

variable "label" {
  description = "The unique label to assign to this cluster. (required)"
  default     = "awesome_cluster"
}

variable "region" {
  description = "The region where your cluster will be located. (required)"
  default     = "us-east"
}

variable "tags" {
  description = "Tags to apply to your cluster for organizational purposes. (optional)"
  type        = list(string)
  default     = ["awesome_cluster", "labs", "k8s"]
}
variable "conn_throttle" {
  description = "Throttle connections per second (0-20). Set to 0 (default) to disable throttling (optional)"
  default     = "20"
}

variable "pools" {
  description = "The Node Pool specifications for the Kubernetes cluster. (required)"
  type = list(object({
    type  = string
    count = number
  }))
  default = [
    {
      type  = "g6-standard-1"
      count = 3
    }
  ]
}
Log in to Terraform Cloud from the CLI
Terraform Cloud runs Terraform operations and stores state remotely, so you can use Terraform without worrying about the stability of your local machine, or the security of your state file.
To use Terraform Cloud from the command line, you must log in. Logging in allows you to trigger remote plans and runs, migrate state to the cloud, and perform other remote operations on configurations with Terraform Cloud.
Workspace Configuration
Working with Terraform involves managing collections of infrastructure resources, and most organizations manage many different collections.
When run locally, Terraform manages each collection of infrastructure with a persistent working directory, which contains configuration, state data, and variables. Since Terraform CLI uses content from the directory it runs, you can organize infrastructure resources into meaningful groups by keeping their configurations in separate directories.
Terraform Cloud manages infrastructure collections with workspaces instead of directories. A workspace contains everything Terraform needs to manage a given collection of infrastructure, and separate workspaces function like completely separate working directories.
Once you have created a Terraform Cloud account and created or joined an organization, you can start managing infrastructure with Terraform Cloud.
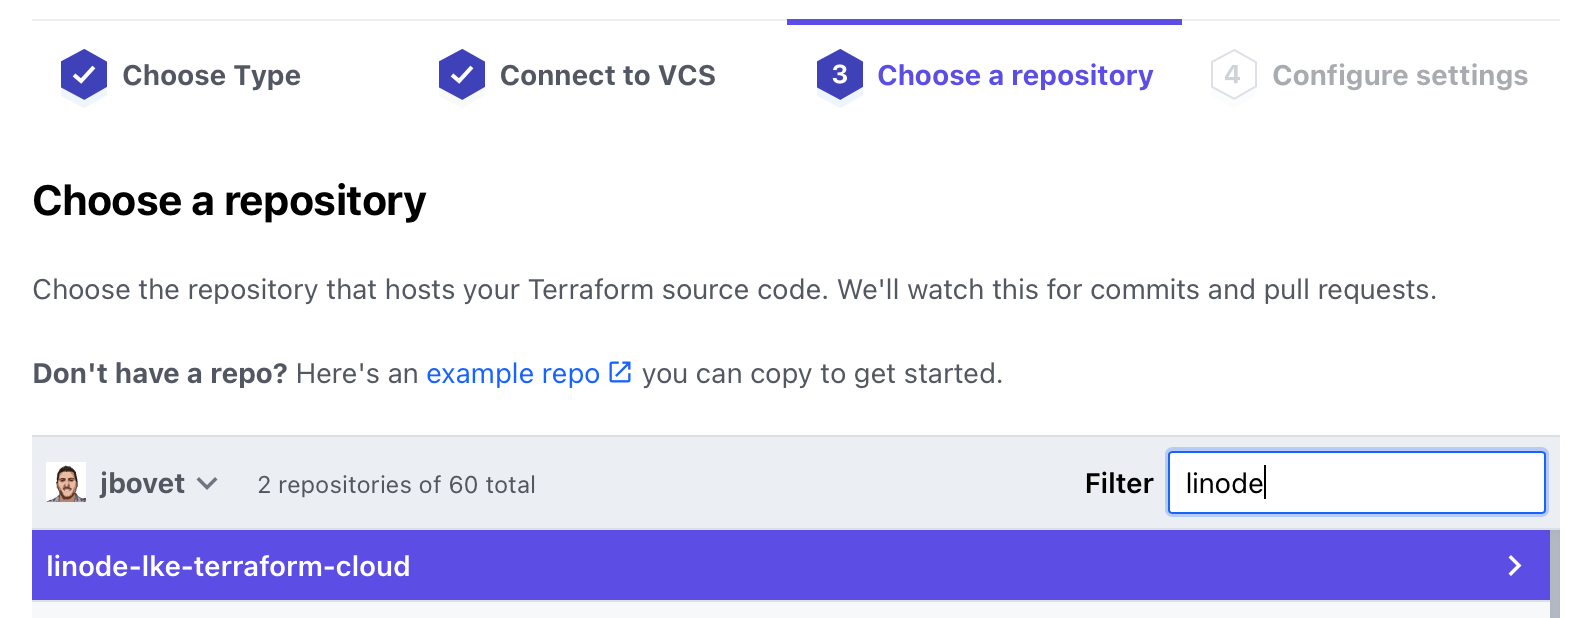
Choose + New workspace button and choose Version Control Workflow


Connect the workspace filtering the GitHub repository.

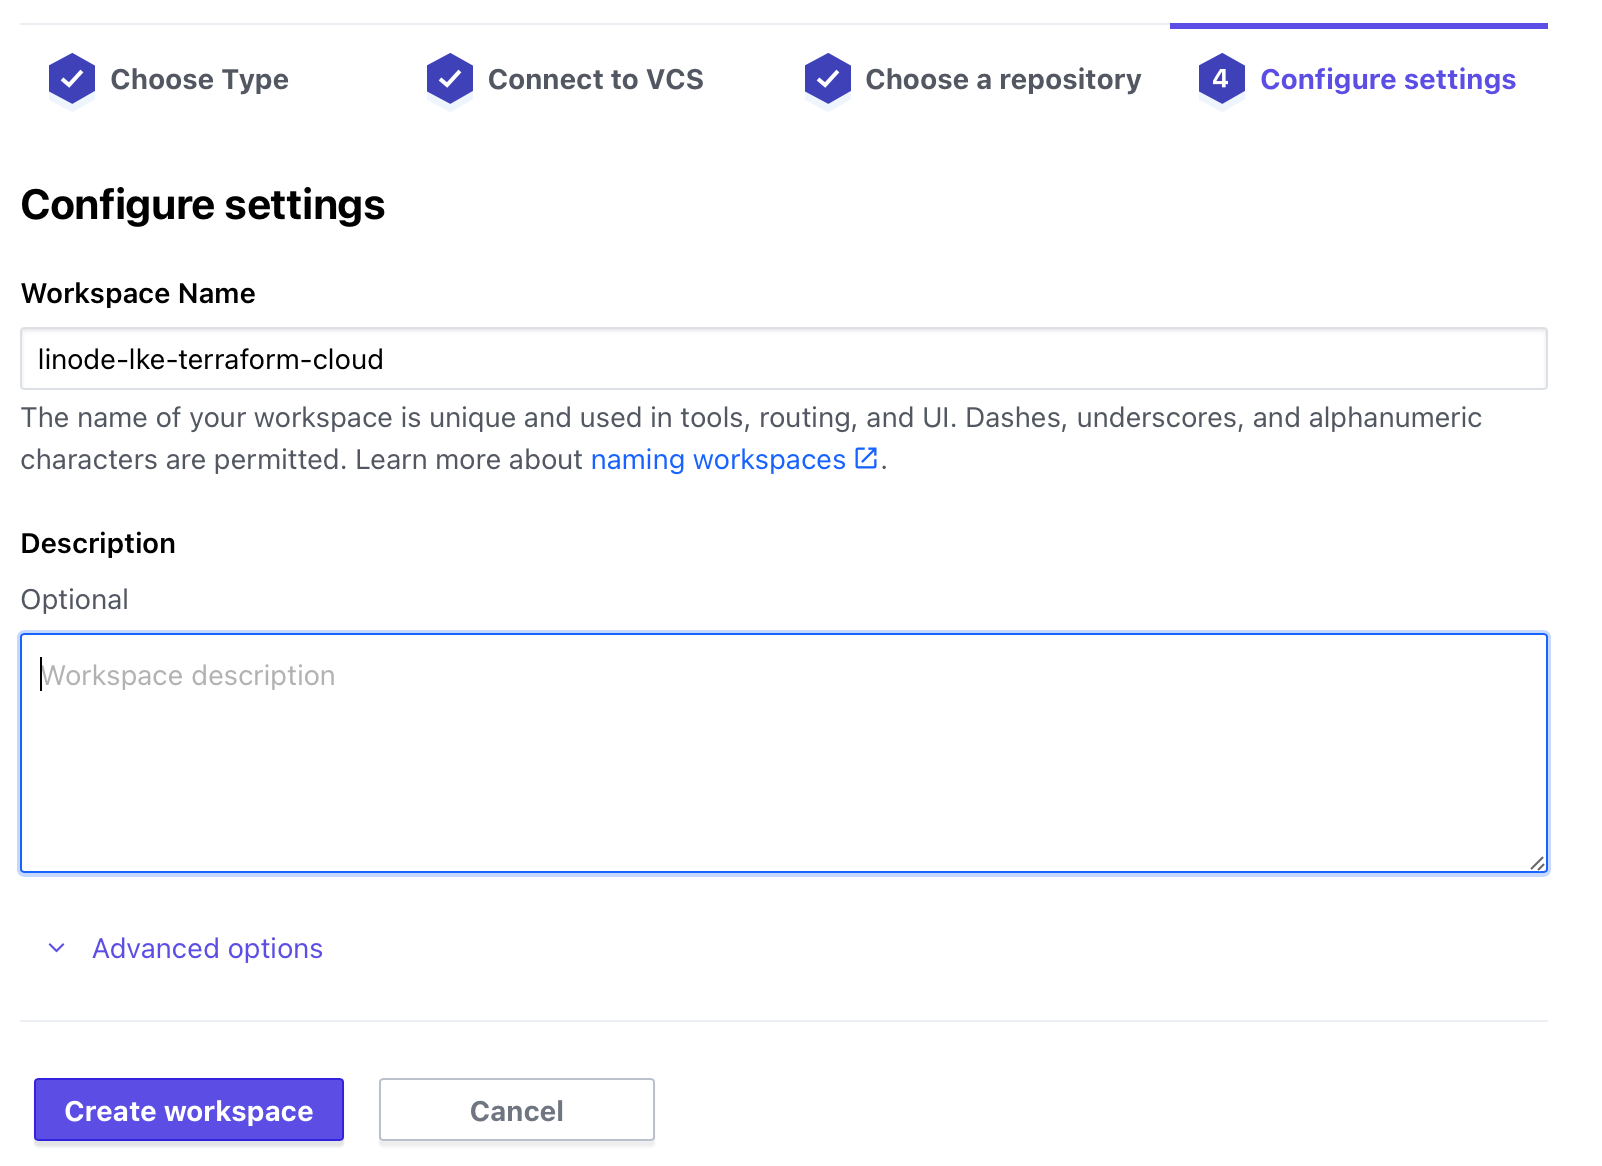
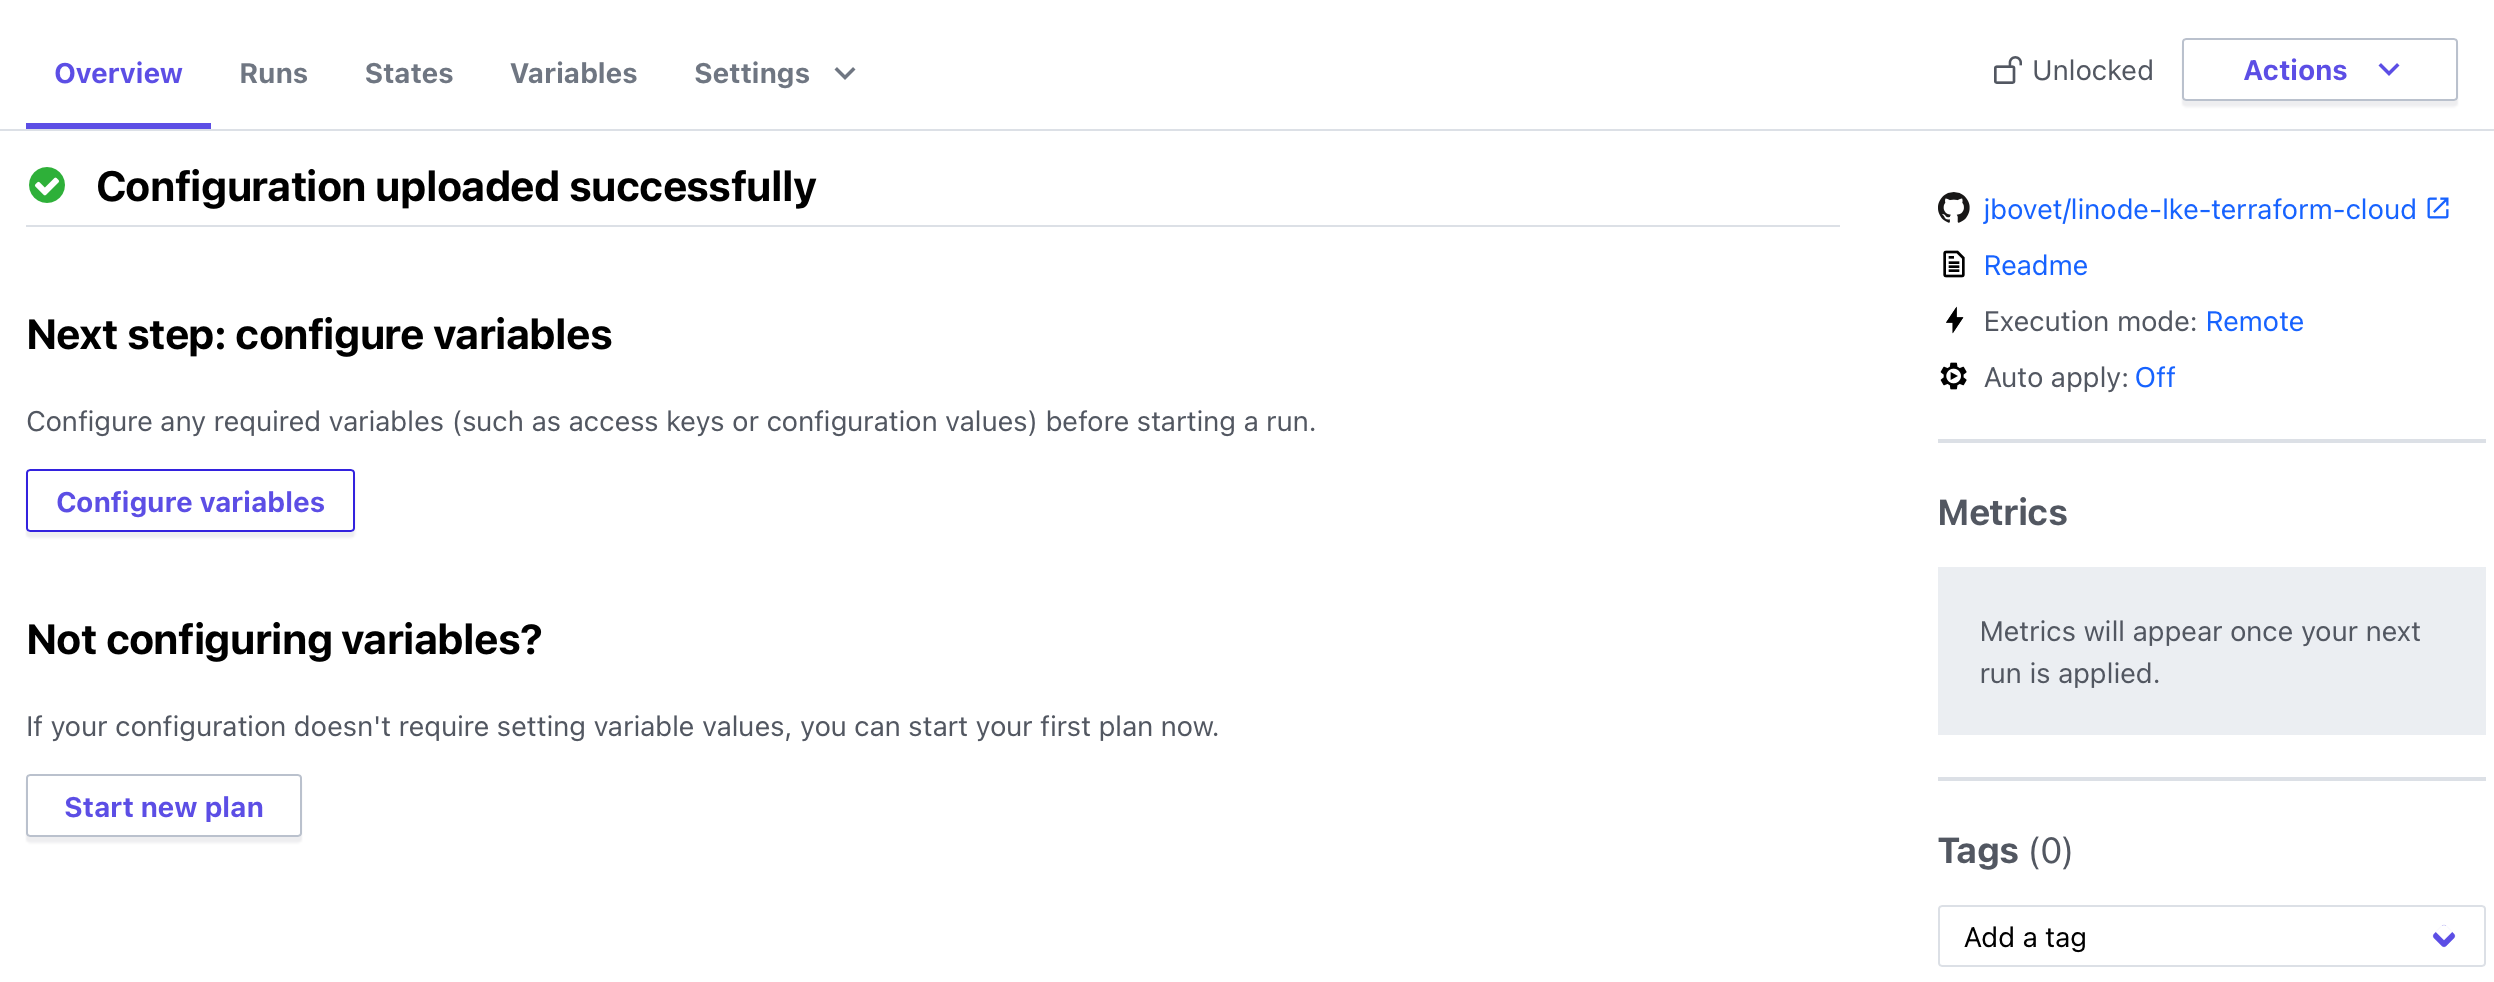
Provide a workspace name like linode-lke-terraform-cloud, once created, we need to set the token as a workspace environment variable.
Now you can able to create the environment variable for the workspace.
Environment Variable.
Terraform Cloud workspace variables let you customize configurations, modify Terraform's behavior, and store information like provider credentials.
You can set variables specifically for each workspace or create variable sets to reuse the same variables across multiple workspaces. For example, you could define a variable set of provider credentials and automatically apply it to all of the workspaces using that provider. Terraform Cloud applies workspace variables to all runs within that workspace.
Then, click + Add variable. Create Terraform variable with the Key token and the value Provisioned from Linode Account.
Note Ensure mark as a Sensitive variable for security concerns.

Configure Terraform working directory
Set terraform directory from GitHub repository to the workspace in the settings workspace configuration, and set the main root directory.

Execute changes preview
The terraform plan command creates an execution plan, which lets you preview the changes that Terraform plans to make to your infrastructure. By default, when Terraform creates a plan it.
The plan command alone will not actually carry out the proposed changes, so you can use this command to check whether the proposed changes match what you expected before you apply the changes or share your changes with your team for broader review.
If Terraform detects that no changes are needed to resource instances or to root module output values, terraform plan will report that no actions need to be taken.
Try running "terraform plan only" to see changes that are required for our infrastructure.

Now you can see all resources that should be created in Linode.

Apply changes to create resources running "terraform plan and apply"


Now, you can check at Linode.com, the awesome Kubernetes cluster, you can able to connect to the cluster with kubectl via kubeconfig YAML

Connect to your LKE Cluster with kubectl
After you’ve created your LKE cluster using the Cloud Manager, you can begin interacting with and managing your cluster. You connect to it using the kubectl client on your computer. To configure kubectl, download your cluster’s kubeconfig file.
Access and Download your kubeconfig
Anytime after your cluster is created you can download its kubeconfig. The kubeconfig is a YAML file that will allow you to use kubectl to communicate with your cluster.
You can download the awesome_cluster-kubeconfig.yaml kubeconfig from the Kubernetes cluster’s page.
Change the awesome_cluster-kubeconfig.yaml file permissions to be only accessible by the current user
chmod go-r /Downloads/awesome_cluster-kubeconfig.yaml Open a terminal shell and save your kubeconfig file’s path to the $KUBECONFIG environment variable. In the example command, the kubeconfig file is located in the Downloads folder, but you should alter this line with this folder’s location on your computer:
export KUBECONFIG=~/Downloads/awesome_cluster-kubeconfig.yaml View your cluster’s nodes using kubectl.
kubectl get nodes➜ ~ kubectl get nodes
NAME STATUS ROLES AGE VERSION
lke66417-xxxx-c359e55 Ready <none> 17m v1.23.6
lke66417-xxxx-62d07c35c700 Ready <none> 17m v1.23.6
lke66417-xxxx-62d07c35f2fd Ready <none> 1 v1.23.6//TODO
Configure LoadBalancer
Bootstrap cluster with Flux
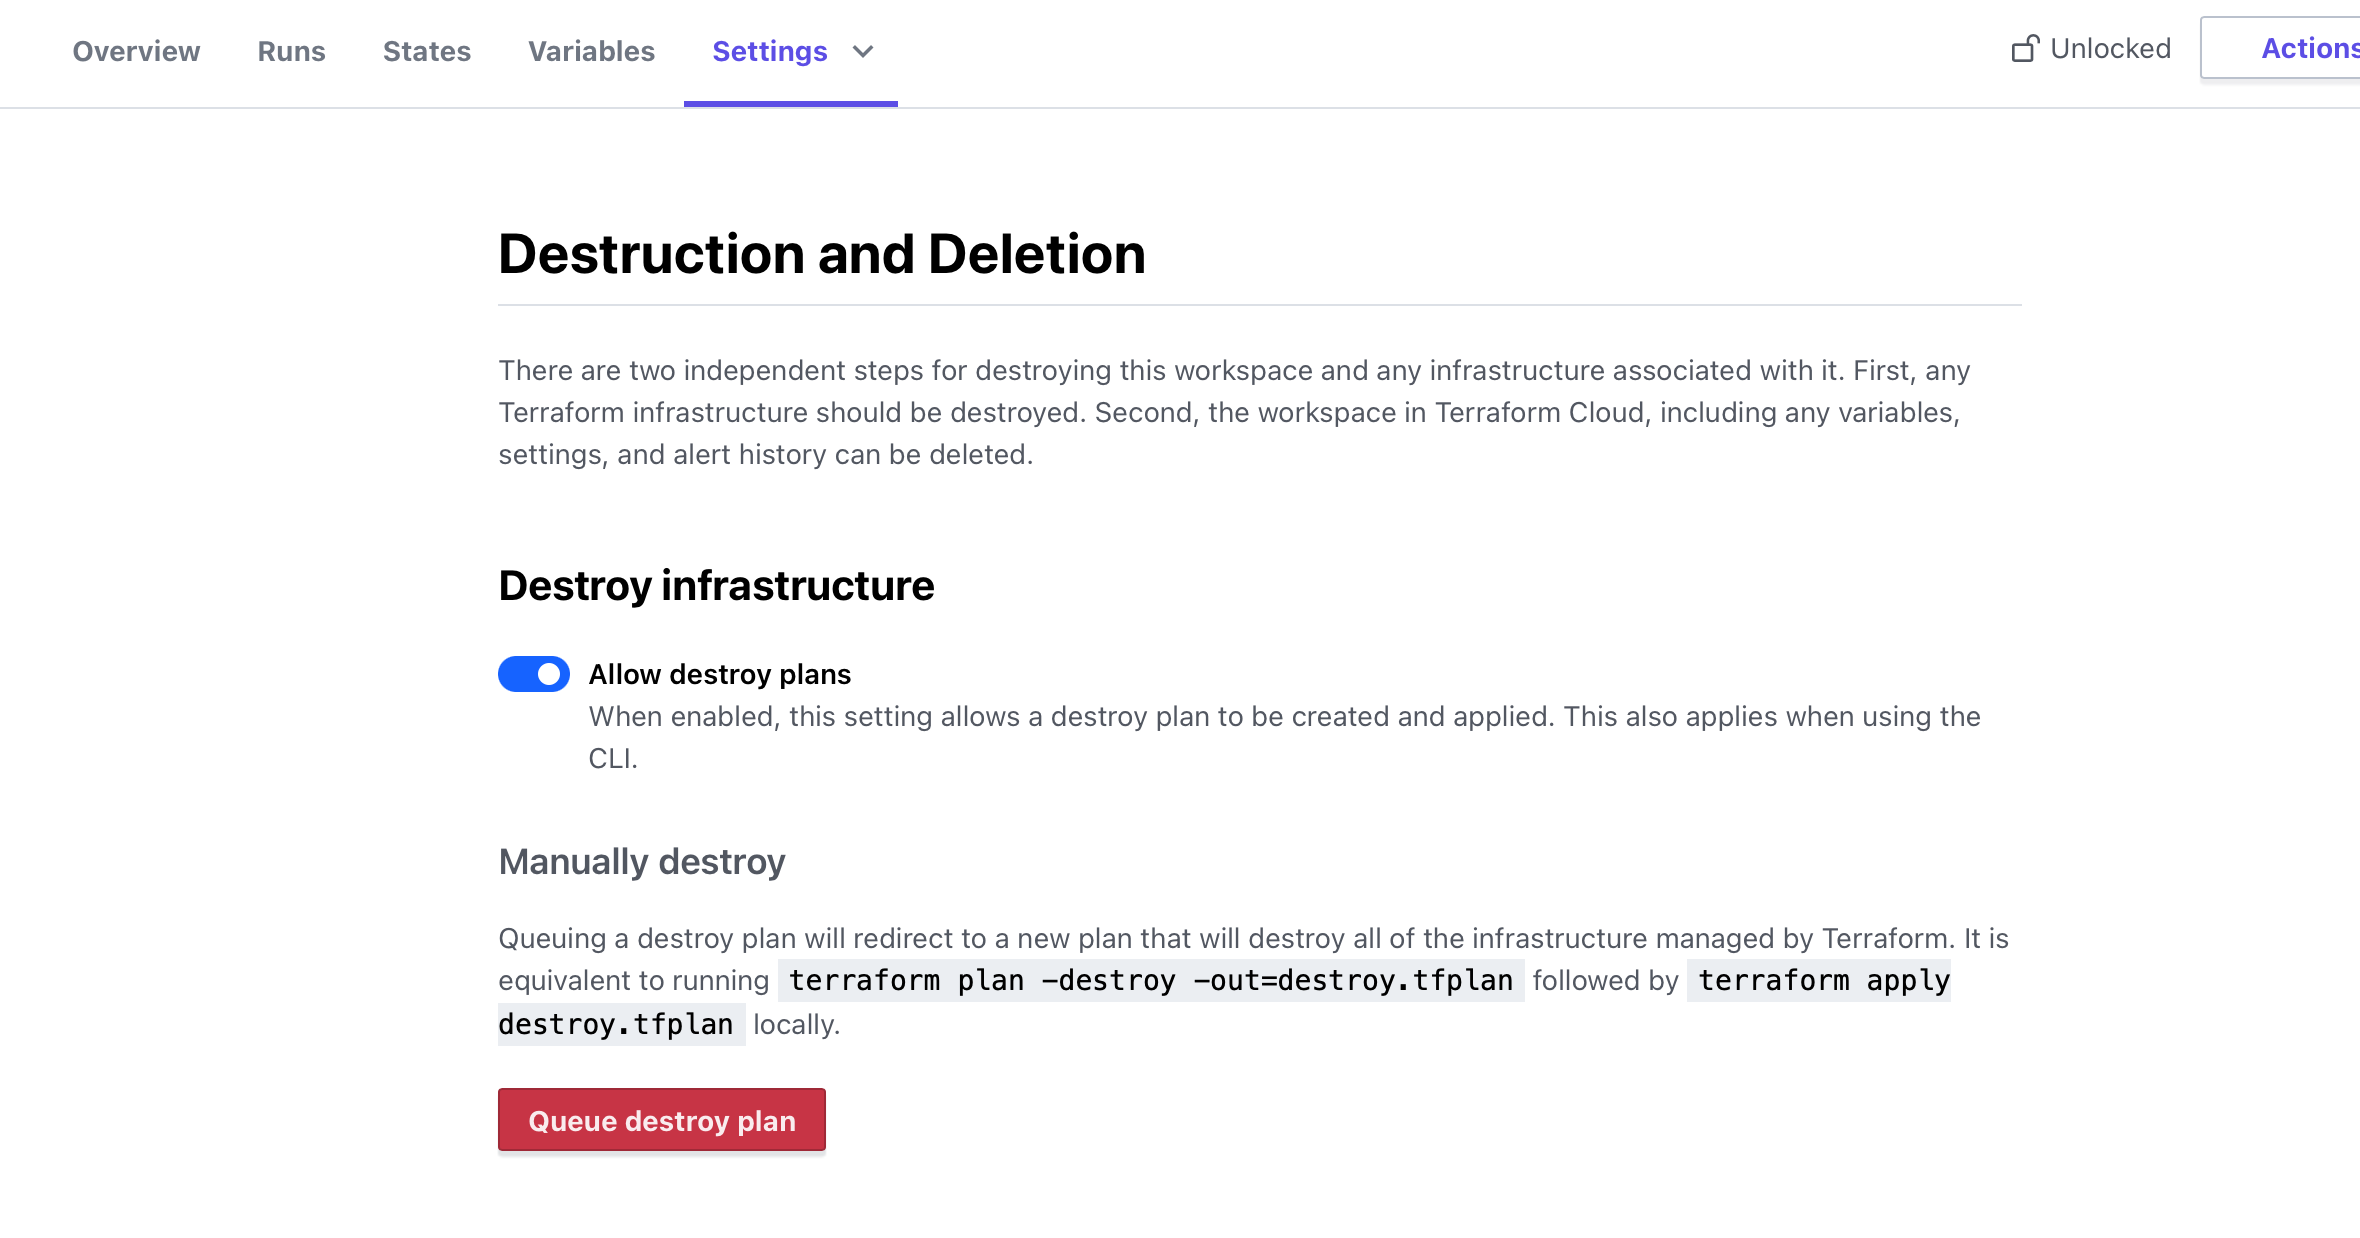
Delete a Cluster
You can delete an entire cluster using terraform destroy from Terraform Cloud.